
Let’s cut to the chase. In this article we will go over the overview, a brief installation, and my opinion of the Eonon Q80Pro.
In this we are installing the unit into my GMT900 Tahoe, but the company makes head units for all kinds of vehicles.
This installation should be similar with the Escalade, Yukon, Silverado and Sierra within the same GMT900 generation.
At the end of the video there is a video of the detailed instructions on how to install the head unit.
Buy the Eonon Q80Pro HERE:
Or buy directly from their website with $10 off of $100 when you use Auto10 at checkout.
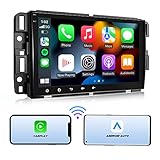
Overview of the Eonon Q80Pro Head Unit:
Although this is still available and works perfectly, click here to read about the updated version!

The Eonon Q80Pro car stereo is a cutting-edge audio system that offers a wide range of features and capabilities to enhance your driving experience. With 18-month warranty for any quality-related issues, Eonon provides excellent customer service to ensure your satisfaction.
High Performance:
The Q80Pro is powered by Android 10.0 and features a Unisoc UIS8581A A55 TRUE Octa-core processor, 3GB RAM, and 32GB ROM (most car stereos are 2GB+32GB), providing a smoother and more stable user experience. The 8-inch 1280720 HD IPS display with a 178° full-viewing angle ensures clear visibility even in daylight. The built-in DSP and 448W surround stereo output deliver immersive sound quality. The Q80Pro also supports Rear/Front camera input, SWC, AM/FM, BT hands-free calling, music, and USB sticks playback (up to 512GB).
Plug & Play:
The Q80Pro is designed to be compatible with a wide range of car models, including Chevrolet, GMC, and Buick (specific models listed in the description), and comes with CANBUS support for features like steering wheel control and reverse signal. If you’re unsure about compatibility, Eonon offers excellent customer service to help you confirm whether the Q80Pro car stereo fits your car.
Wireless Connectivity:
The Q80Pro offers both wireless and wired connections, making it easy to access apps on your iPhone or Android phone. Compatible with iPhone 5 and later, and Android phones with 11.0 and later versions, you can connect your smartphone to the Q80Pro wirelessly through Bluetooth and use GPS navigation, make calls, send/receive messages, listen to music, and more functions via CarPlay or Android Auto while you focus on driving.
Advanced Bluetooth Features:
The Q80Pro features Bluetooth 5.0 for faster transmission speed and longer effective distance. You can make hands-free calls, play music, and download phonebook by connecting your phone to the car stereo. The Q80Pro also supports Bluetooth music streaming.
Installing the Headunit into a 2008 Tahoe:
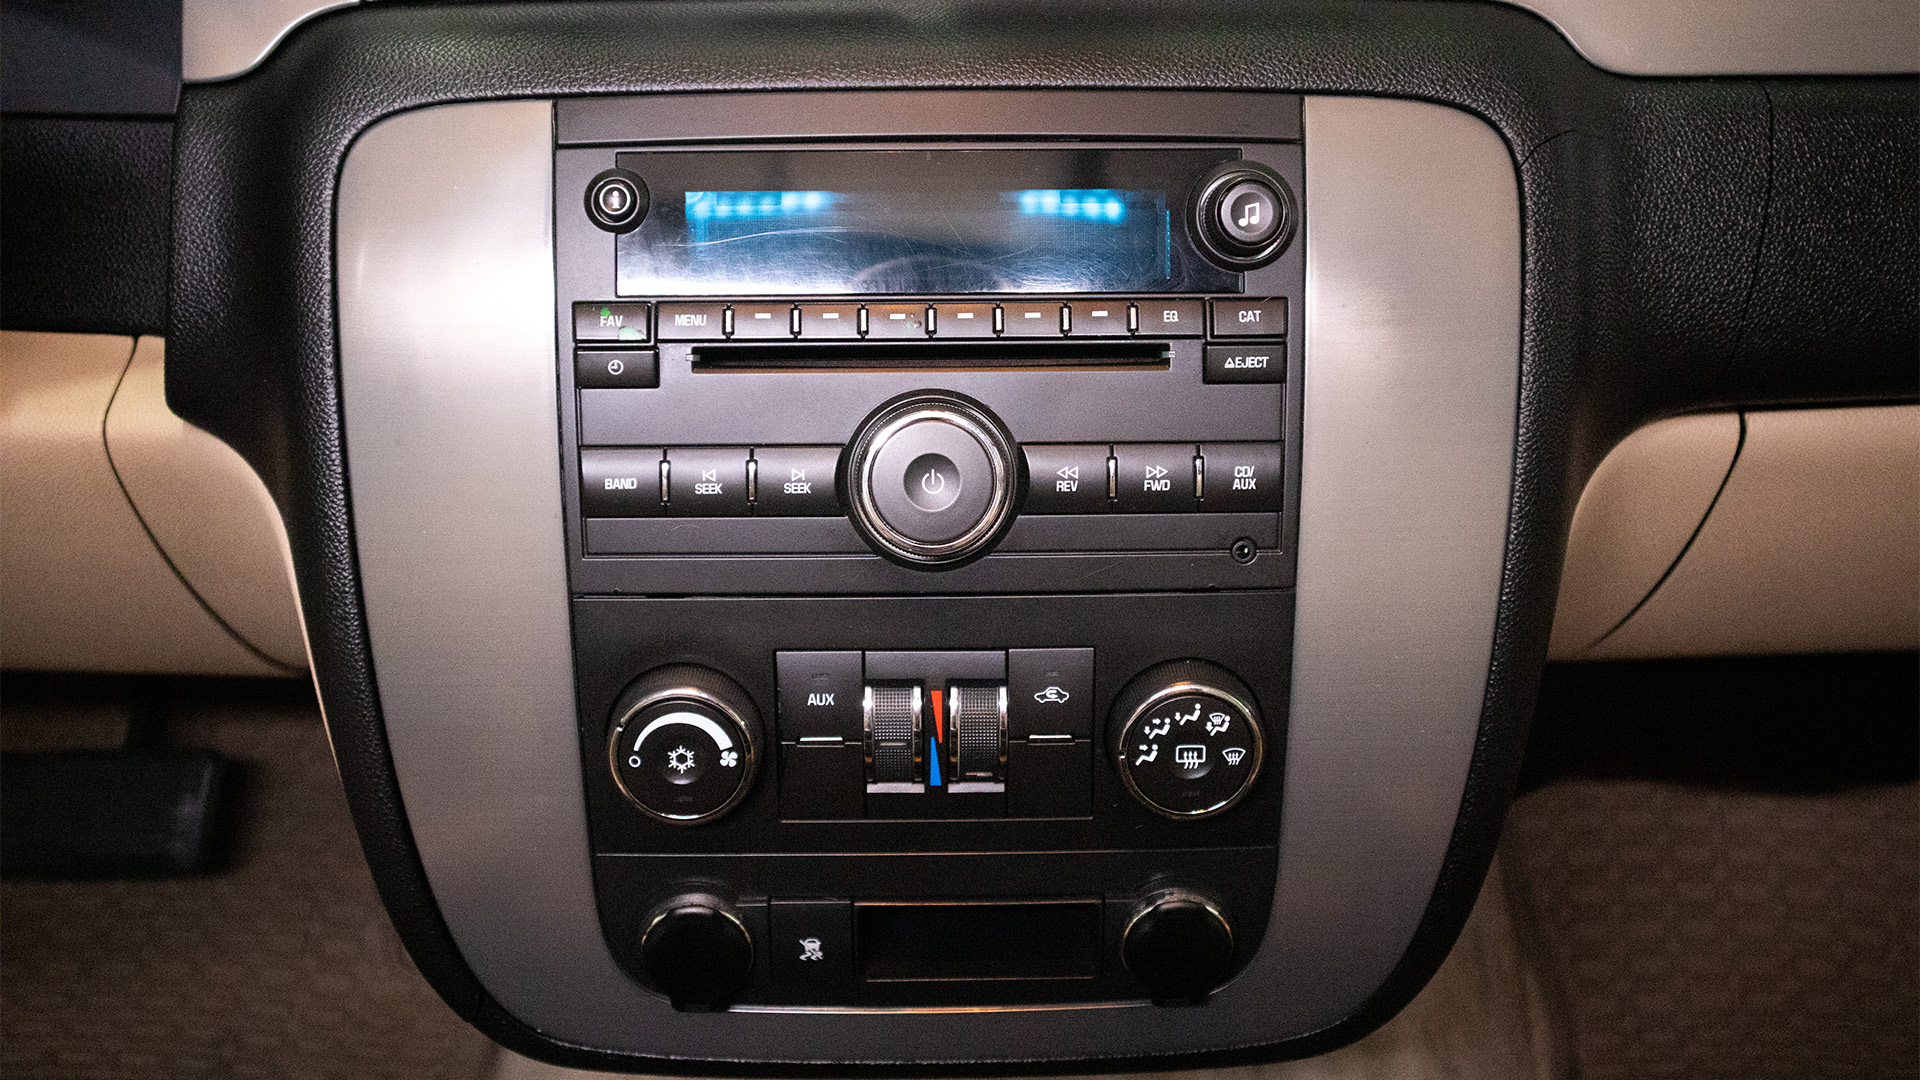
The old unit in the Tahoe
Today, we will be reviewing and fully going over how to install a stereo, backup camera, and OBD2 scanner in your car. We will provide you with a step-by-step guide on how to do it yourself. This installation should be similar with Escalade, Yukon, Silverado and Sierra within the same GMT900 generation.
Step 1: Removing the Old Stereo
To start, you will need to uninstall the old stereo from your car. With some inexpensive panel trim removers be careful to avoid damaging your car’s interior. Using these trim removers, remove the trim panel from the top, starting from the top and working your way down. There are usually four clips on both sides that need to be released. Once the trim panel is removed, you will have access to the stereo.
Step 2: Disconnecting the Stereo
Using a 7mm, remove any bolts holding the stereo in place. Be cautious as some dashboards may have cracks that could affect the bolts. Once the bolts are removed, carefully pull out the stereo and unplug the connectors attached to it. There may be push tabs that need to be pressed in to release the connectors. Keep the connectors unplugged for now.
Step 3: Installing the New Stereo
Refer to the wiring diagram provided with your new stereo. Plug in the connectors from the new stereo, making sure they are inserted in the correct orientation. Connect any additional cables, such as the USB cable for Apple CarPlay, and secure them in their respective locations.
Step 4: Installing the Backup Camera
To install the backup camera, you will need to access the reverse tail light. Remove the tail light using a Phillips head screwdriver and locate the blue and black wires that correspond to the reverse light. Ideally, use quick splice snap wire connectors to connect the red wire from the camera to the blue wire of the tail light, and the black wire from the camera to the black wire of the tail light. This will allow the camera to receive power and transmit video when the car is in reverse.
Step 5: Routing the Wires
Once the camera is connected to the tail light, carefully route the wires behind the interior panels of your car to conceal them. Use the panel trim removers to remove any necessary panels and secure the wires in place using clips or ties. Be sure to route the wires away from any moving parts or hot surfaces.
Step 6: Installing the OBD2 Scanner
To install the OBD2 scanner, locate the OBD2 port in your car. This is usually located under the dashboard, near the driver’s side. Plug the OBD2 scanner into the port and route the cable to a convenient location for easy access. You may need to secure the cable using clips or ties.
Step 7: Reassembling the Interior
After all the components are installed and the wires are routed, carefully reassemble the interior of your car. Start by reattaching the trim panels in the reverse order of removal. Make sure all the connectors are securely plugged in and all the panels are properly aligned. Reinstall any bolts that were removed, and tighten them securely.
Step 8: Testing the Installation
Before finishing, test the stereo, backup camera, and OBD2 scanner to make sure they are functioning properly. Check that the stereo turns on, the backup camera displays video when the car is in reverse, and the OBD2 scanner is able to communicate with your car’s computer.
Final Thoughts:
In conclusion, I really enjoy the head unit and it really hasn’t cause me any trouble. The graphics are pretty high quality and it really updates the interior of the Tahoe. Instead of buying a new car with the fancy gadgets and gizmos, upgrade your car and save loads of money. Installing a stereo, backup camera, and OBD2 scanner in your car can be a straightforward process with the right tools and instructions. Follow the steps outlined in this guide to ensure a successful installation. With your new audio system, improved safety with the backup
Tired of reading? Here is the in-depth review on installing the head unit!